Hill Engineering recently published new research presenting an innovative new way to measure near-surface residual stress more reliably than conventional techniques. The paper is titled Near Surface Residual Stress Measurement Using Slotting and appears in Experimental Mechanics. The abstract text is available here along with a link to the publication.
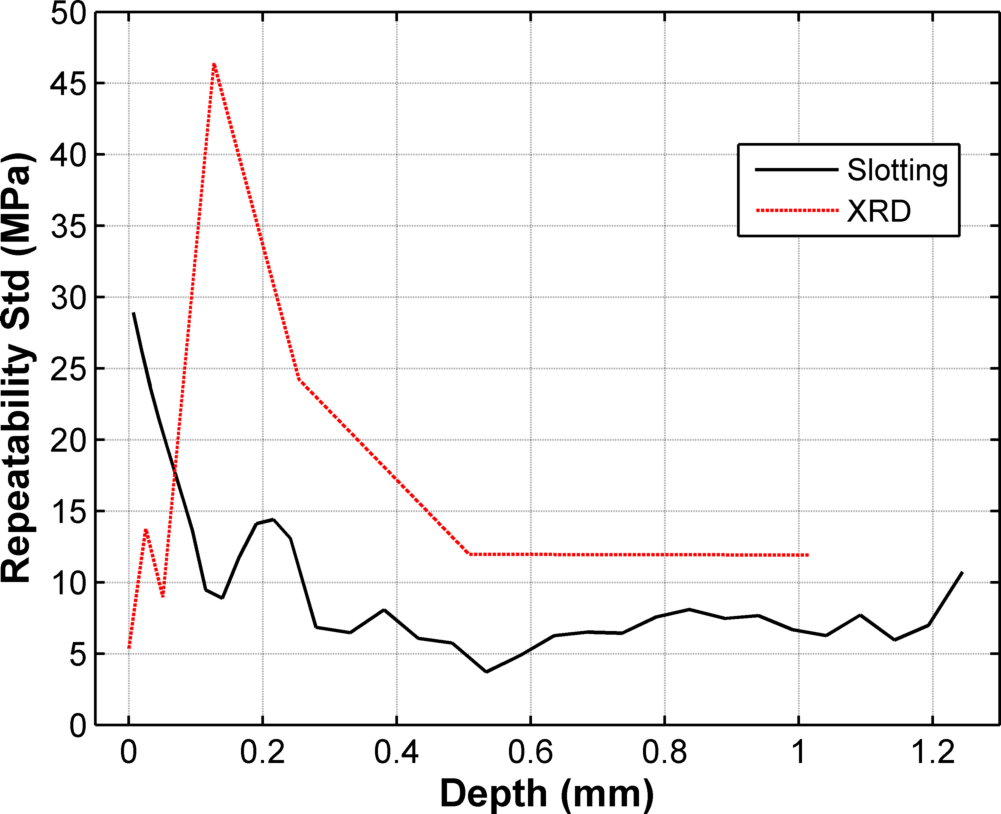
There are various experimental measurement techniques used to measure residual stress and this work describes one such method, the slotting method, and its application to measure near surface residual stresses. This work examines its application to macro-scale specimens. A series of numerical experiments were performed to understand the size required to assume that the specimen is infinitely large, namely the thickness, width, and height. To assess measurement repeatability, 12 slotting measurements were performed in a shot peened aluminum plate. The numerical experiments determined the specimen should have a thickness greater than or equal to 21.6 mm (0.85 in), a total specimen width (normal to the slot length) greater than or equal to 44.5 mm (1.75 in), and total height (parallel to the slot) greater than or equal to 38.1 mm (1.5 in) for the specimen to be assumed to be infinite. Slotting measurement repeatability was found to have a maximum repeatability standard deviation of 30 MPa at the surface that decays rapidly to 5 MPa at a depth of 0.3 mm from the surface. Comparison x-ray diffraction measurements were performed. Infinite plate dimensions and slot length were determined as well as measurement repeatability. Slotting was shown to have significantly better repeatability than X-ray diffraction with layer removal for this application.

If you are interested, the full publication is available here.