TrueSlot® – near surface residual stress measurement

TrueSlot® is an innovative technique for measuring near-surface residual stress that is more reliable than conventional techniques.

TrueSlot® is a residual stress measurement technique for generating a profile of residual stress versus depth from the material surface. The stress computation is similar to slitting but offers more sensitivity near the surface due to the proximity of the strain gage.

Additionally, TrueSlot® is globally less invasive than slitting because the volume of removed material is localized to the surface and does not typically extend through most of the specimen thickness.

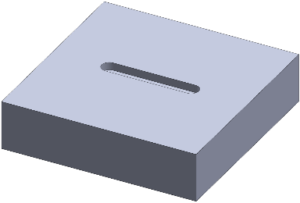
A solid model block with a long but thin slot cut out of the top.
A model of a completed TrueSlot® method measurement.

The physical application of TrueSlot® is like hole drilling, however instead of a shallow hole being milled into the body of a specimen containing residual stress, the material removed is a shallow slot. The strain released with each incremental slot depth is measured near the slot using a strain gage.

TrueSlot® is useful for

  • Production quality control applications
  • Applications requiring in-field measurements with portable equipment
  • Near-surface residual stress determination
  • Parts with large or complex geometry
  • Applications with challenging measurement access
  • Applications requiring rapid turn time

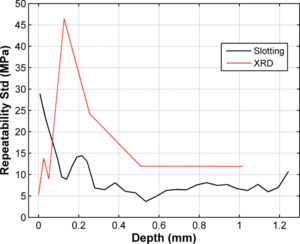
TrueSlot® was found to have better repeatability when compared with conventional x-ray diffraction.

A plot with depth and repeatability as the axis and two lines of data, one red, the other black. For most depths, the red line is higher than the black, signifying that XRD is less repeatable than slotting.
Results from the method repeatability study which found TrueSlot® to be a more repeatable measurement method than XRD

You can read about our repeatability study here.

TrueSlot® measurements are performed using our DARTTM system for automated residual stress measurement.

ExpressRS® – expedited residual stress results

Are you working on a project with a tight deadline? We’re here to help!

Hill Engineering offers expedited residual stress measurement services (ExpressRS®). With ExpressRS®, our customers can expect the same level of high-quality residual stress measurement results within an accelerated delivery time – typically less than 1 week for most jobs and next day service is available in select cases. When our customers choose ExpressRS®, their project is given priority in our measurement laboratory queue to help meet tighter deadlines without sacrificing quality.

A close-up image of the DART system completing a hole drilling residual stress measurement.
The DART system performing an automated hole drilling residual stress measurement.

Hill Engineering is a global leader in residual stress measurements. We believe every materials engineer, designer, and manager should have solid data upon which they can make sound decisions. Our broad range of best-in-class measurement capabilities ensures that we can tailor our approach to your specific project needs.

The following residual stress measurement techniques are available through ExpressRS®:

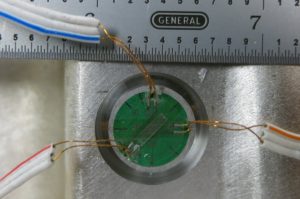
A ring cut into an aluminum surface circumscribing a green strain gage with thin wires attached.
A completed ring core measurement – one of the residual stress measurement techniques available through Express RS.

Hill Engineering has the expertise to address issues arising in materials, manufacturing, and design engineering, with unique capabilities in residual stress measurement, material testing, service life assessment, and mechanical design. Our laboratory maintains an active ISO 17025 accreditation.

ExpressRS® gives our customers access to this expertise with urgency. If you have any questions or are interested in utilizing our rapid-results service, please contact us for more information.

Strain Gaging Services

Strain gages are devices used to measure strain on the surface of an object. These strain measurements can be used to infer the amount of stress induced on the object, as is done with many types of residual stress measurements.

Additionally, strain gages can be used to measure things such as aircraft wing deflection, bridge cable creep, and tensile testing for material properties, making them an ideal tool for in-field measurements.

Strain gages come in many shapes and sizes and can measure strain in a single direction or in multiple directions, depending on the goal of the experiment. Strain gages can be used on a wide variety of materials under many conditions, such as in extreme temperatures or underwater.

Hill Engineering has extensive experience with strain gage application and can help design the experiment needed to reach your project’s goals. Strain gage application can be performed in our laboratory or at your site, to your specifications.

Strain gage application is useful for:

  • Applications requiring in-field measurements with portable equipment
  • Measuring strain in multiple directions
  • Parts in every shape and size – nothing is too big or too small
  • Measuring residual stress

If you’re interested in how we apply a strain gage to a simple specimen, watch our video:

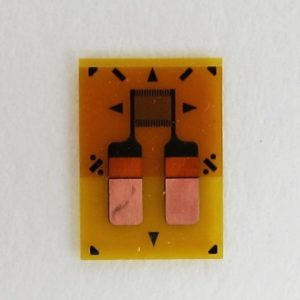
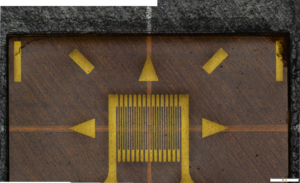
Photograph of a uniaxial strain gage
Zoomed in image of a uniaxial strain gage grid
A photograph of a pile of various strain gages

Residual Stress

Residual stress is the stress present in a material in the absence of externally applied loading. These stresses can often form during manufacturing, and are typically an unintentional byproduct of a manufacturing process. Residual stresses can be caused by a number of factors, including plastic deformations, temperature cycles, or phase transformations.

Residual stresses can positively or negatively affect a product’s performance, which makes them a vital consideration for any critical design component. Often, structures are designed with considerable safety factors, in which case the effects of residual stress can be ignored, but as we push for higher performing structures that operate closer to the cutting-edge of technology, factors like residual stress can be the difference between successful performance and structural failure.

Positive values of residual stress are referred to as tensile, meaning the material is being pulled or stretched. Unintended tensile residual stresses can cause undesirable results, including cracking and failure. If tensile stresses induced by manufacturing processes are not taken into account, these can lead to premature failure.

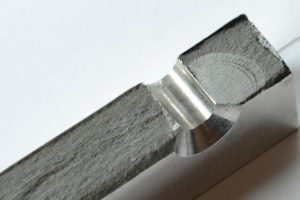
A slim metal coupon with a fracture surface showing a crack growth area shaped like ripples from a source location.
A fatigue crack that grew from a countersunk fastener hole.

Negative values of residual stress are referred to as compressive, meaning the material is being pushed together. These kinds of residual stresses can improve the performance of fatigue-critical components. Surface treatment processes like shot peening and laser shock peening intentionally introduce compressive stress in select locations at the material surface to make products perform better. For instance, introducing compressive residual stress can toughen brittle materials such as glass in smartphone screens or pre-stressed concrete used in city infrastructure.

A construction worker wearing a yellow hard hat crouched over a grid of metal rebar.
Rebar is often used to negatively pre-stress concrete in order to prevent cracking.

Overall, the residual stress on any given plane in a material must be in equilibrium, but there can be local regions with tensile or compressive stress. Below is our Residual Stress 101 vlog, which highlights the information above.

Residual stress engineering involves the practice of manipulating residual stresses in order to maximize the usability and lifespan of manufactured components.

Through residual stress measurement techniques, Hill Engineering is capable of quantifying the internal stresses in a material, to better inform design decisions. We are the industry leader in Contour Method measurements and provide the same level of precision and accountability in a broad range of other residual stress measurement methods.

The methods we employ are as follows:

Hill Engineering is a trusted source for a wide range of measurement capabilities. For more information about residual stresses or any of the residual stress measurement techniques we employ at Hill Engineering, feel free to contact us.

Measurement-driven, model-based estimation of residual stress and its effect on fatigue crack growth. Part 2: fatigue crack growth testing and modeling

This paper assesses the accuracy of fatigue crack growth (FCG) predictions for high-strength aluminum samples containing residual stress (RS) and complex two-dimensional cracks subjected to constant amplitude load. FCG predictions use linear-elastic, multi-point fracture mechanics. A first prediction includes RS estimated by the model described in Part 1; a second prediction includes RS measured by the contour method. FCG test data show a significant influence of RS. Ignoring the RS results in a +60% error in predicted FCG life (non-conservative). Including RS improves predictions of crack growth significantly (errors better than +26% (estimated RS) and -14% (measured RS)).

Link

Measurement-driven, model-based estimation of residual stress and its effects on fatigue crack growth. Part 1: validation of an eigenstrain model

The objective of this paper is to validate a measurement-driven, model-based approach to estimate residual stress (RS) in samples machined from quenched aluminum stock. Model input is derived from measurement of RS in the parent stock. Validation is performed for prismatic T-sections removed from bars at different locations. We find RS predicted agrees with RS measured, by contour and neutron diffraction methods, with root-mean-square model-measurement difference of 22 MPa. Follow-on work (in Part 2) applies the RS estimation to samples representative of aircraft structures and examines the effects of RS on fatigue crack growth in the RS-bearing samples.

Link

Near Surface Residual Stress Measurement Using Slotting

There are various experimental measurement techniques used to measure residual stress and this work describes one such method, the slotting method, and its application to measure near surface residual stresses. This work examines its application to macro-scale specimens. A series of numerical experiments were performed to understand the size required to assume that the specimen is infinitely large, namely the thickness, width, and height. To assess measurement repeatability, 12 slotting measurements were performed in a shot peened aluminum plate. The numerical experiments determined the specimen should have a thickness greater than or equal to 21.6 mm (0.85 in), a total specimen width (normal to the slot length) greater than or equal to 44.5 mm (1.75 in), and total height (parallel to the slot) greater than or equal to 38.1 mm (1.5 in) for the specimen to be assumed to be infinite. Slotting measurement repeatability was found to have a maximum repeatability standard deviation of 30 MPa at the surface that decays rapidly to 5 MPa at a depth of 0.3 mm from the surface. Comparison x-ray diffraction measurements were performed. Infinite plate dimensions and slot length were determined as well as measurement repeatability. Slotting was shown to have significantly better repeatability than X-ray diffraction with layer removal for this application.

Link

Measurement Layout for Residual Stress Mapping Using Slitting

Residual stress spatial mapping has been developed using various measurement methods, one such method comprising a multiplicity of one-dimensional slitting method measurements combined to form a two-dimensional (2D) map. However, an open question is how to best distribute the individual slitting measurements for 2D mapping. This paper investigates the efficacy of different strategies for laying out the individual slitting measurements when mapping in-plane residual stress in thin stainless steel slices removed from a larger dissimilar metal weld. Three different measurement layouts are assessed: independent measurements on nominally identical specimens (i.e., one slitting measurement per specimen, with many specimens), repeatedly bisecting a single slice, and making nominally sequential measurements from one side of the specimen towards the other side of the specimen. Additional comparison measurements are made using neutron diffraction. The work shows little difference between the independent and bisecting slitting measurement layouts, and some differences with the sequential measurements. There is good general agreement between neutron diffraction measurement data and the data from the independent and bisecting layouts. This work suggests that when using slitting to create a 2D map of in-plane residual stress, a cutting layout that repeatedly bisects the specimen works well, requires a small number of specimens, and avoids potential errors from geometric asymmetry or measurement sequence.

Link

Precision of Hole-Drilling Residual Stress Depth Profile Measurements and an Updated Uncertainty Estimator

Measurement precision and uncertainty estimation are important factors for all residual stress measurement techniques. The values of these quantities can help to determine whether a particular measurement technique would be viable option. This paper determines the precision of hole-drilling residual stress measurement using repeatability studies and develops an updated uncertainty estimator. Two repeatability studies were performed on test specimens extracted from aluminum and titanium shot peened plates. Each repeatability study included 12 hole-drilling measurements performed using a bespoke automated milling machine. Repeatability standard deviations were determined for each population. The repeatability studies were replicated using a commercially available manual hole-drilling milling machine. An updated uncertainty estimator was developed and was assessed using an acceptance criterion. The acceptance criterion compared an expected percentage of points (68%) to the fraction of points in the stress versus depth profile where the measured stresses ± its total uncertainty contained the mean stress of the repeatability studies. Both repeatability studies showed larger repeatability standard deviations at the surface that decay quickly (over about 0.3 mm). The repeatability standard deviation was significantly smaller in the aluminum plate (max ≈ 15 MPa, RMS ≈ 6.4 MPa) than in the titanium plate (max ≈ 60 MPa, RMS ≈ 21.0 MPa). The repeatability standard deviations were significantly larger when using the manual milling machine in the aluminum plate (RMS ≈ 21.7 MPa), and for the titanium plate (RMS ≈ 18.9 MPa). The single measurement uncertainty estimate met a defined acceptance criterion based on the confidence interval of the uncertainty estimate.

Link

DART – automated residual stress measurement

Near-surface residual stress data is critical when assessing material performance, optimizing design, validating models, evaluating field failures, and executing quality assurance programs. Hill Engineering’s DART™ is an industry-leading tool for efficient, precise, and reliable near-surface residual stress measurements. The DART™ overcomes limitations of existing residual stress measurement equipment and includes everything required to perform state-of-the-art measurements in accordance with industry specifications.
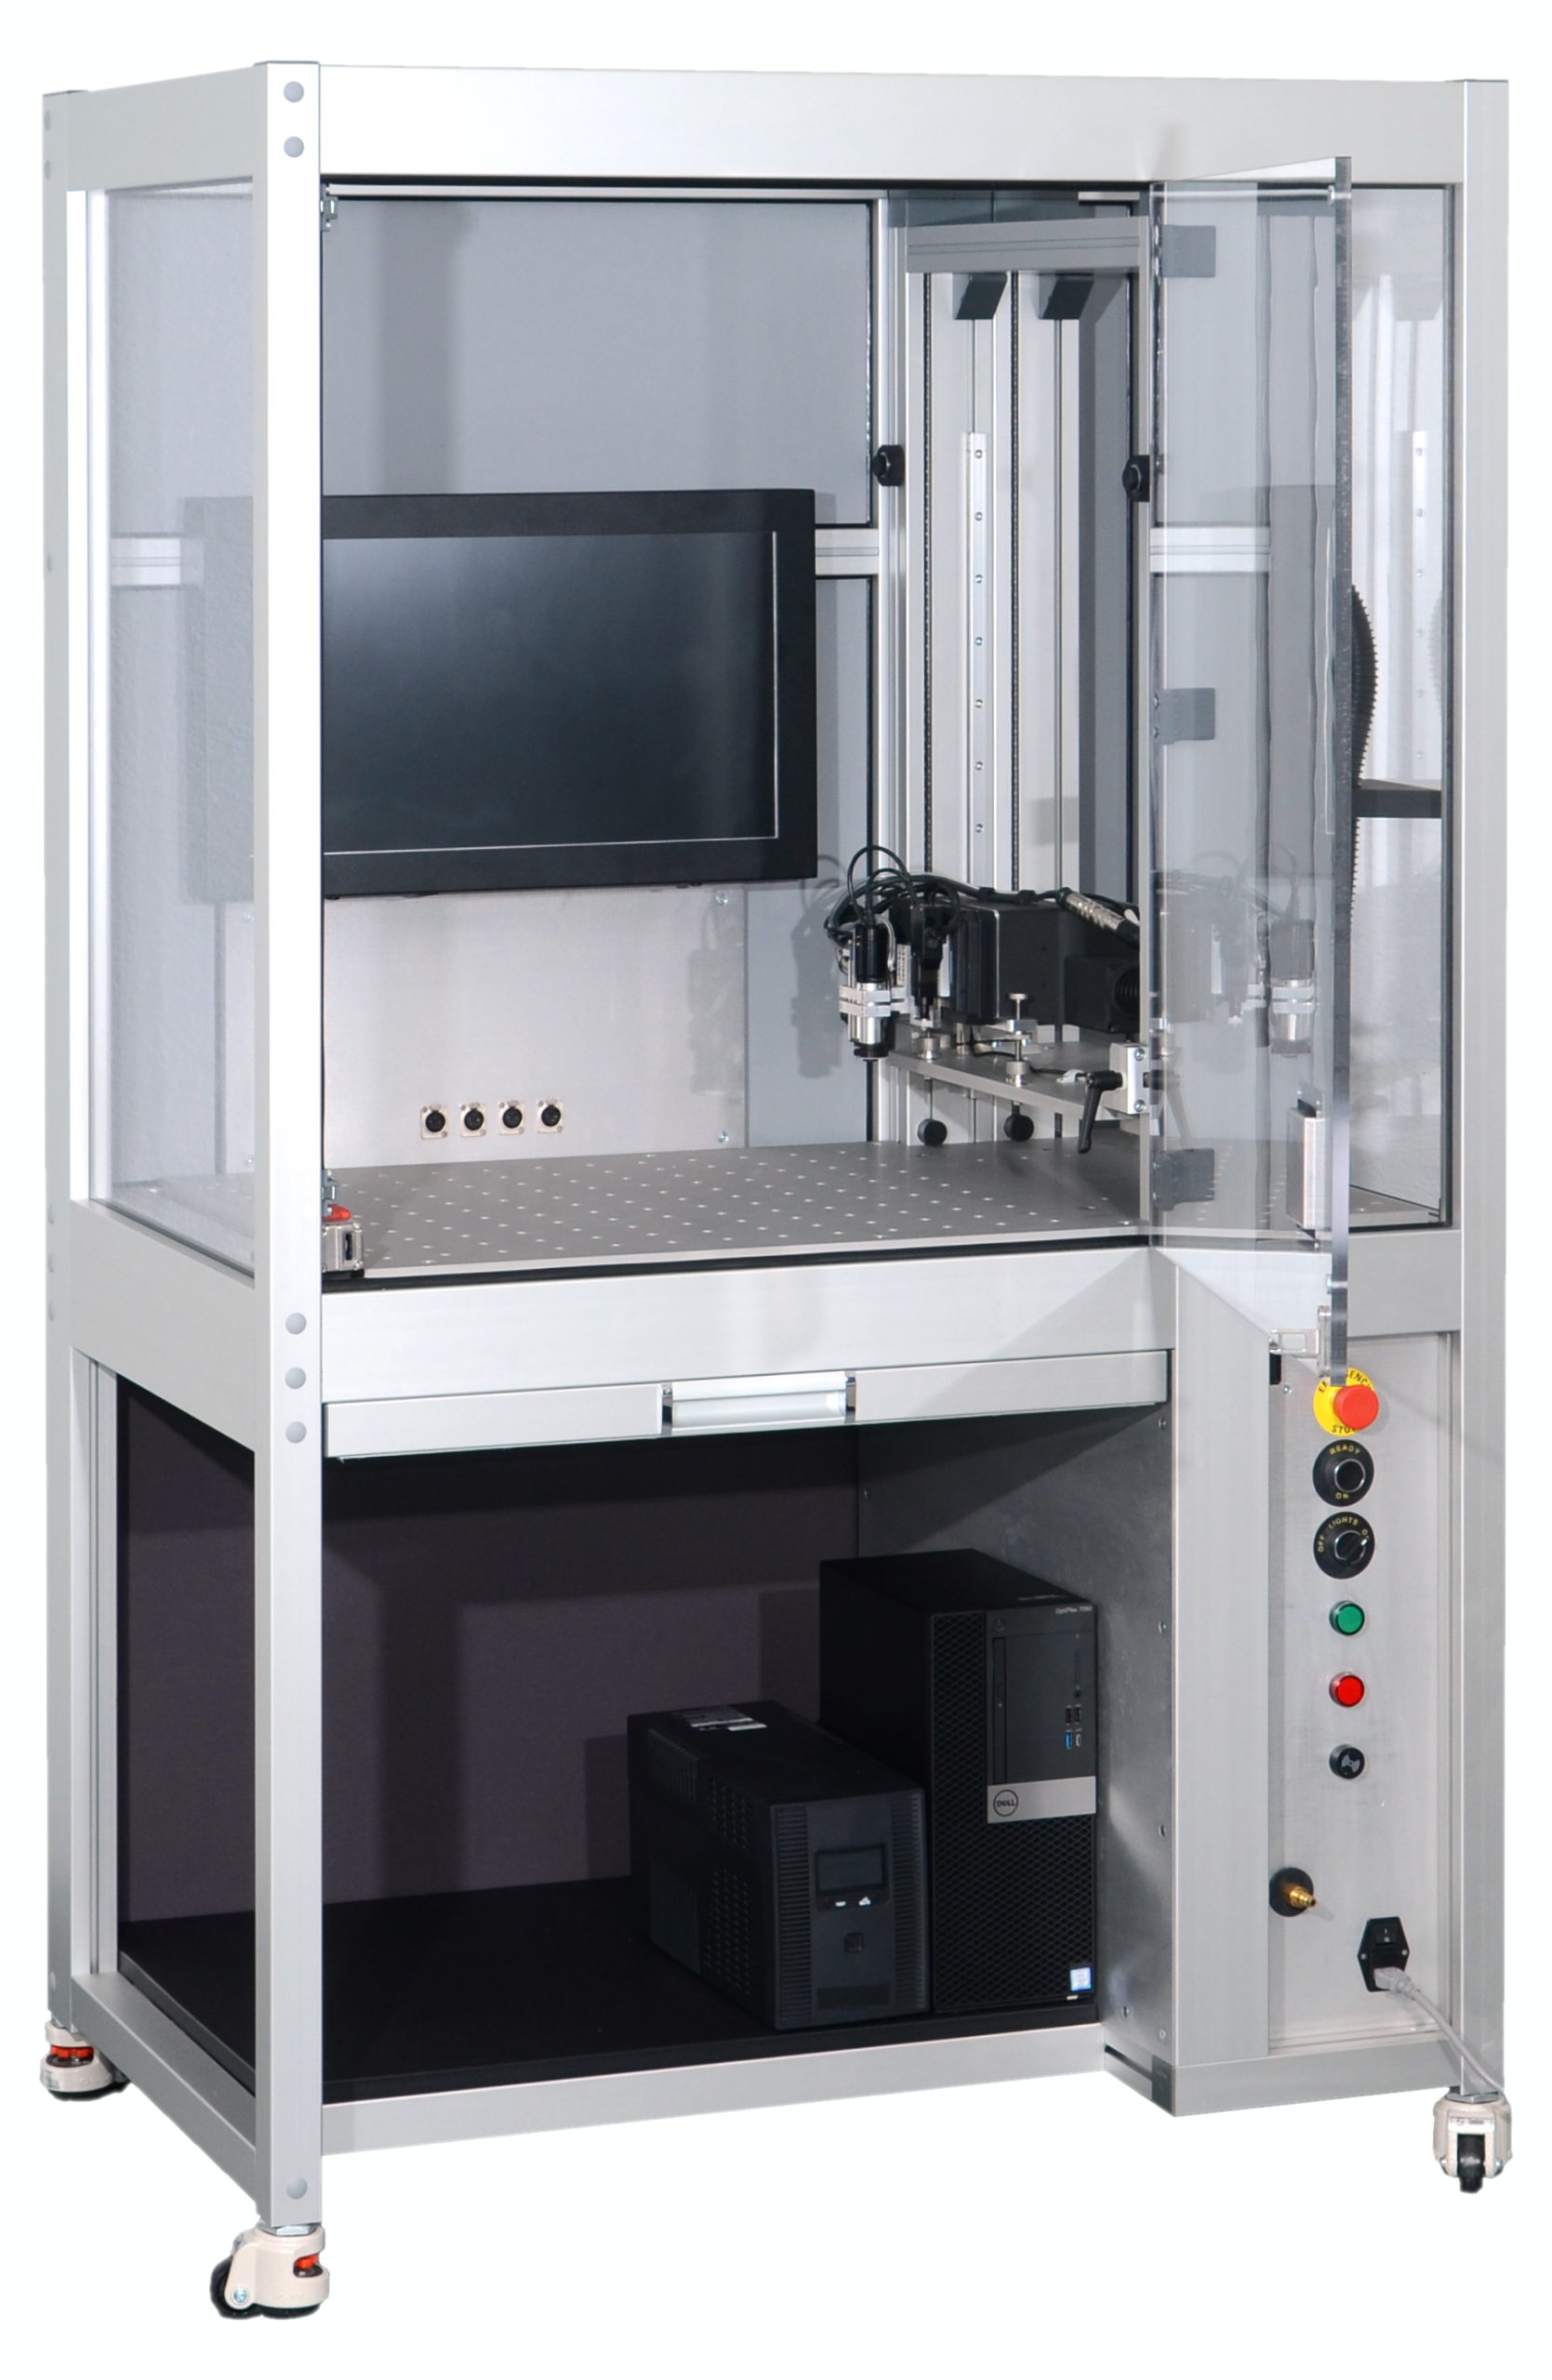
 

Hill Engineering’s DART™

A single DART™ can perform near-surface residual stress measurements using multiple techniques including hole drilling
and TRUEslot® methods. This flexibility is helpful when requirements change or new applications arise. The DART™ executes hole-drilling residual stress profile measurements in accordance with ASTM E837, providing a depth profile of the three in-plane residual stress components in a single measurement. TRUEslot® is a novel technique, like hole-drilling, but simpler and more precise. TRUEslot® provides a depth profile of one stress component per measurement.
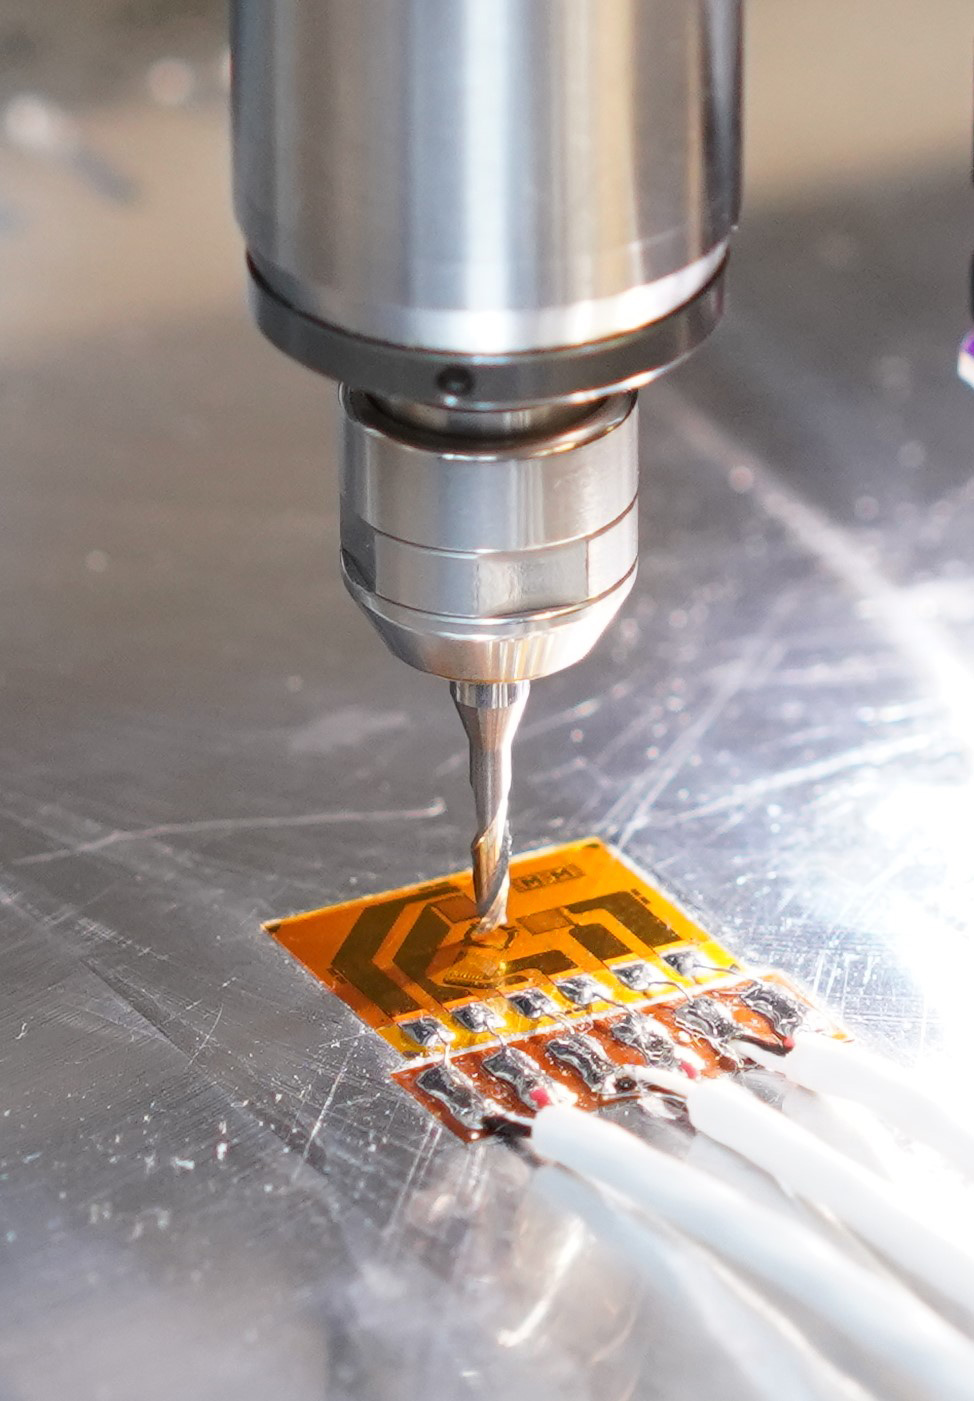
 

Hole drilling measurement example
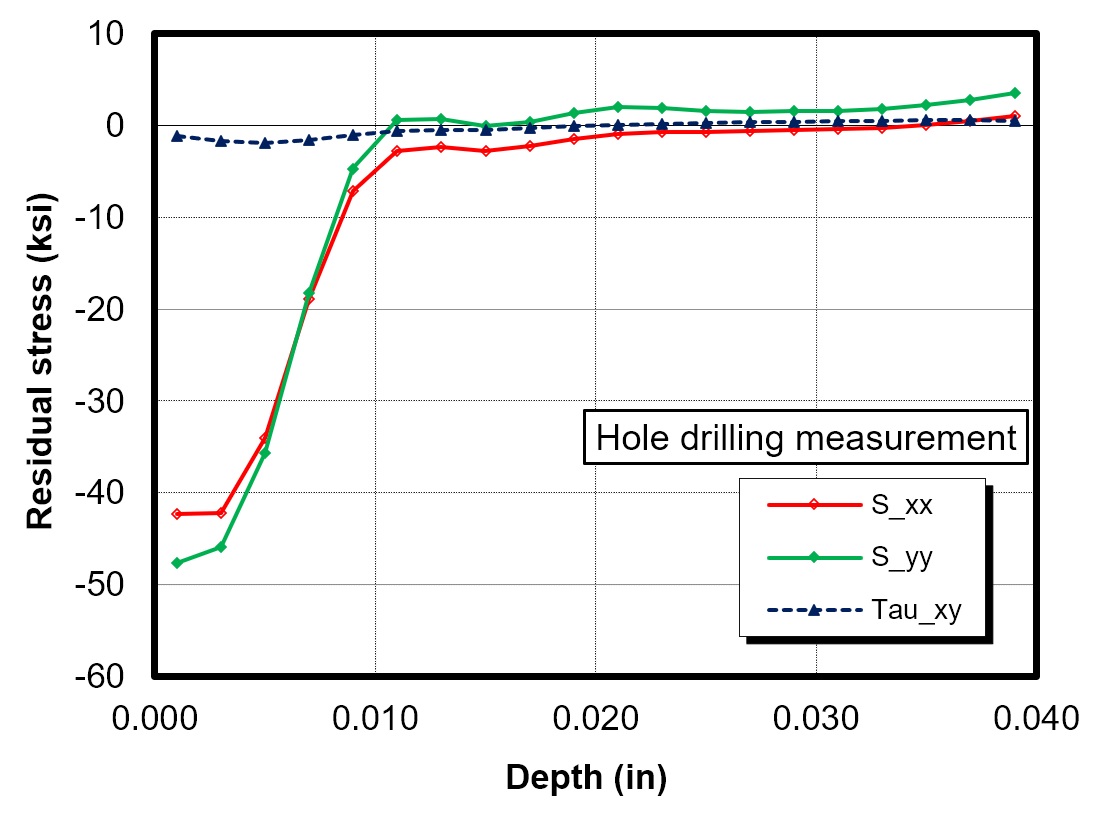
 

Hole drilling results example

Intuitive
Residual stress measurements with the DART™ are easy to complete. A user interface guides you through set-up, then takes over for automated measurement execution and residual stress calculation.

Efficient
With measurements completing in less than 60 minutes, the DART™ excels in the production quality management environment. Automated data capture, processing, and archiving provide you with residual stress results instantly.

Reliable
Featuring advanced cutting strategies and real-time quality checks, the DART™ gives you confidence in your residual stress data.

Features
• Hole drilling residual stress measurements according to ASTM E837
• TRUEslot® residual stress measurements
• Positional accuracy: ± 0.001 in.
• Works on most materials including: aluminum, titanium, steel, stainless steel, and nickel alloys
• Custom fixtures can be integrated to meet the needs of individual applications
• NFPA 79 compliant

Software

Each DART™ includes a complete software package that enables efficient and repeatable residual stress measurements for high-volume or single-use applications. DART™ software is designed for ease-of-use, while maintaining flexibility to meet your measurement needs and providing controls to maximize reliability. An operator defines the measurement location, the type of measurement (TRUEslot® or hole-drilling), and inputs the key measurement details. Following set-up, the software automatically controls the incremental material removal process, acquires the experimental data, computes residual stress, and outputs a test report. The entire process is significantly more efficient than other available tools.

DART™ produces the highest-quality residual stress data available
Precise engineering and extensive use of automation within the DART™ provides a demonstrated 50%+ improvement in measurement repeatability relative to other hole drilling test equipment. Hole drilling and TRUEslot® measurements performed using a DART™ have been shown to be 60%+ more repeatable than X-ray diffraction measurements.
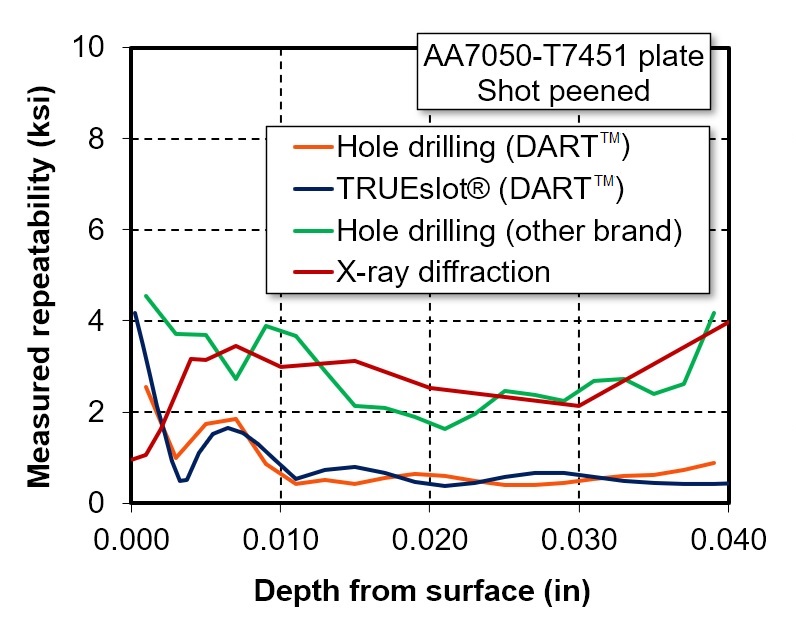
 

DART™ outperforms its competitors in RS measurement repeatability

The DART™ has proven to meet our high internal standards for data quality and is currently in use in multiple facilities throughout the world. It could be in your facility soon.

To place an order for DART™ related goods or services, please contact us.

Download a DART™ brochure here

The following are a list of patents pertaining to DART™ and TRUEslot®. Additional patents are pending for other international jurisdictions.

United States

  • US10900768B2 – Systems and methods for analysis of material properties of components and structures using machining processes to enable stress relief in the material under test

Japan

  • JP7258393B2 – Analysis that enables stress relaxation of the material under test
  • JP2023025055A – Analysis that allows stress relaxation in material to be tested